latest news
How to inspect a lanyard
By Mark Dolan, General Manager
I recently wrote about correct specification of fall arrest systems and briefly explained what components make up the system. While correct specification is crucial, so too is correct use so over the next couple of weeks I plan to focus on two main components, the lanyard (connector) and harness (the body support) which are dependent upon correct usage.
Lanyards
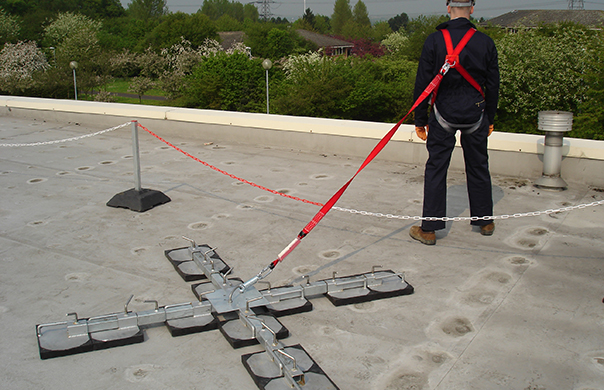
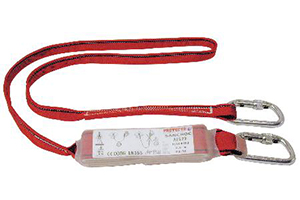
Lanyards, or connectors as they can be referred to, are made from webbing, rope or cable. One end connects to the anchor point while the other connects to the D-ring on the back of a harness.
If the lanyard is being used in a fall arrest situation it must be shock absorbing so that it can limit the force of the fall on the worker to below 6Kn. In fall restraint situations, the lanyard must be of a fixed length to prevent the user from reaching a fall situation.
Lanyard inspection requirements
All lanyards should have an inspection regime which includes pre-use checks, detailed inspections and, if required, interim inspection.
When it comes to more detailed inspection, guidelines can be confusing. For example BS EN 365 says that lanyards must be inspected at least every 12 months, but you will find that most manufacturers recommend more frequent inspections should be carried out. On the other hand, the HSE recommends that detailed inspections should be undertaken every six months, and every three months if the lanyard is in frequent use.
- Pre-use checks are essential and must be carried out each time a lanyard is to be used. Pre-use checks involve both tactile and visual inspections
- Detailed inspections are more structured and should be undertaken every six months. If the lanyard is being used frequently, then inspections should ideally be every three months.
- Interim inspections may be needed in addition to detailed inspections when a risk assessment has identified that the working environment could potentially cause serious deterioration of the lanyard, for example in acidic or alkaline environments or where paints and chemicals are being used.
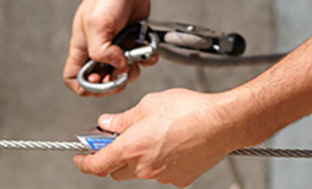
How to inspect a lanyard
The key to competent lanyard inspection is to remember, webbing, stitching and hardware. Focussing on these areas will help to ensure a comprehensive inspection is carried out.
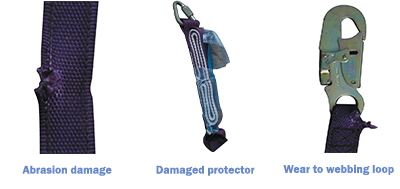
Typical defects and damage to lanyards include:
- cuts at the edges of webbing lanyards of 1mm or more
- abrasion across the face of the webbing and at the webbing loops
- damage such as abrasion or cuts to stitching
- a knot in the lanyard that is not part of the design
- flaking on the surface or a change in the fibre’s colour which could indicate chemical attack
- glazed or hardened fibres which can be the result of heat or friction damage
- loss of colour or powdery surface which can be signs UV degradation
- a partially deployed energy absorber
- contamination such as dirt, grit or sand which can lead to internal and external abrasion
- damaged or deformed karabiners and connectors
- damage to the sheath and core of the kernmantel rope
Withdrawing a Lanyard
If there is any sign of damage to a lanyard, or you are in any doubt about its safety, withdraw the lanyard from use immediately, and give it to a competent person to carry out a detailed inspection to determine if the lanyard can be used or if it should be destroyed or returned to the manufacturer for further tests.
If a lanyard has been used to arrest a fall, it should NEVER be used again.
Next Time
In the next part of this Blog series, I’ll be looking at harnesses, in particular how to inspect and wear a harness correctly.